
Example: Shifting Pipes
In this example, pipes have been captured against a set of parcels from old cadastral data.
New (more accurate) cadastral data has been released, but the relative position of our pipes regarding these new cadastral parcels is often wrong.
The figure below shows the pipes as a light blue line, with point assets along these lines, and the old cadastral parcels in dark blue. The pipes were captured against these cadastral parcels, so their relative positions are considered to be accurate.

Initial state: parcels, pipes and point assets
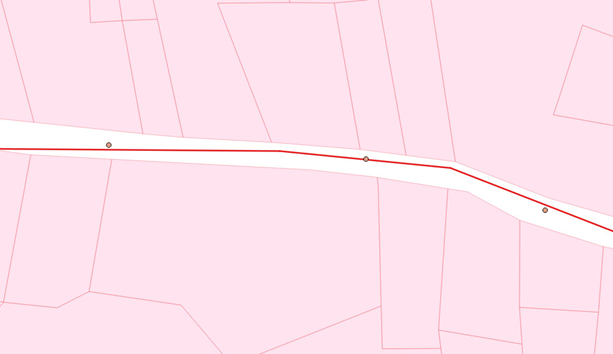
The next figure below shows the same pipes against the new, more accurate cadastral data in red.
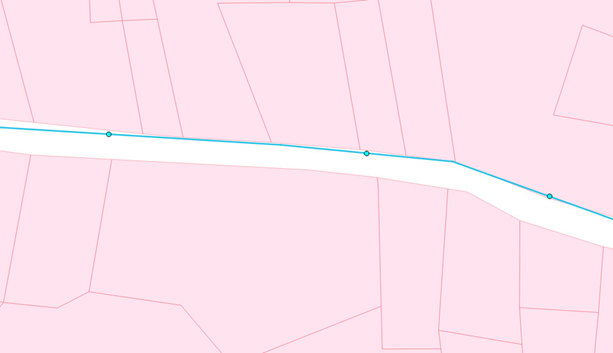
Old pipes with new parcels
We can see that the relative position of the pipes to these cadastral parcels cannot be correct; the pipes cross the cadastral parcels in places. We therefore need to shift the pipes to adjust their position to the new cadastral parcels.
In this scenario the supplier of the base data has not provided shift vectors so these are first calculated from the old and new base data.
The figure below shows an action that compares the position of centre of two parcels v1 (old parcels) v2 (new parcels) which are matched using their ID attribute.
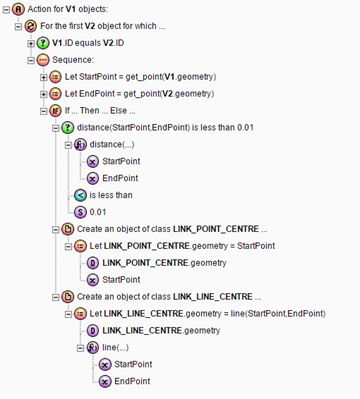
Action to generate shift vectors
If they are close enough, a LINK_POINT_CENTER object is created. This will be used to register a no-shift point.
Otherwise a LINK_LINE_CENTER object is created. This will be used to register a shift vector.
The figure below shoes a set of shift vectors that have been computed between the centroids of the matching parcels using this action.

New parcels and shift vectors
The next step is to register our computed shifts to our shift field "Shift Network", using the built-in operation register_shift_vector.
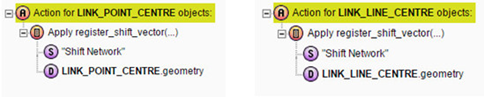
Actions to register the no-shift points and shift vectors within the “Shift Network” shift field
We can now apply the shift to the pipes and point assets.

Action to shift the pipes
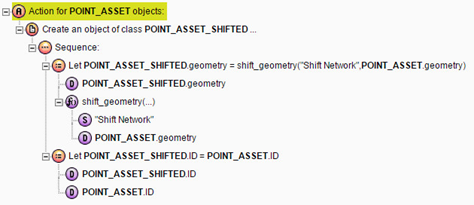
Action to shift the point assets
The figure below shows the results obtained by shifting the pipes and the point assets according to our shift field.
Shifted pipes and point assets without constraint
The pipe is now in an acceptable position regarding the new parcels, but we notice that the point assets which were initially positioned along the pipe are now disconnected from it.
This is because the line was moved by applying the shift vectors to its vertices. If the point assets were far away from vertices of the line, then their shifting could be dictated by other nearby shift vectors, which could be different to those affecting the two vertices on either side along the line.
To avoid this problem, we register the pipe as a constraining feature (see Record Geometric Constraints), so that point features on the pipe remain on it after the shift.
Note: Adding constraining features must be done after having registered the shifts, and before shifting features.
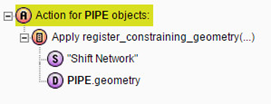
Registering constraining features
The figure below shows the result obtained when applying the shift after having registered the pipe as a constrained feature. The shifted point assets now lay on the shifted pipe.
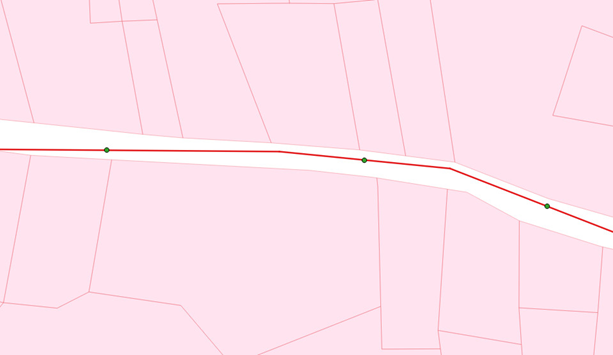
Shifted pipe and point assets, using a constraining pipe
The final figure below shows all the original data with the results superimposed, to help visualise the overall solution.
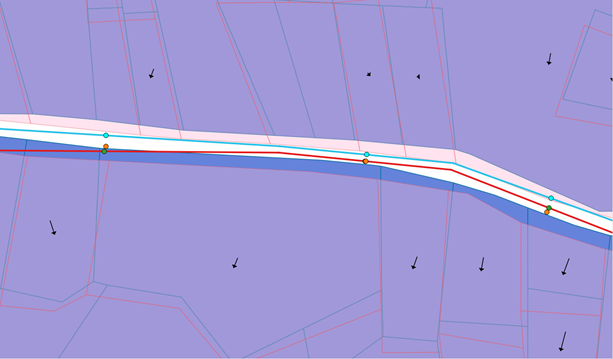
Source data and results superimposed

Copyright © 2017 1Spatial

